My blog post of screen dumps on installing Docker on Bodhi Linux.
Essentially I want to find out if docker push is slow on my network or if MiniKube somehow is slower.
Summary
Pushing container image to Docker Hub using Docker CLI was quite fast. But still unsure if MiniKube Docker is slower in comparison to using just Docker. Something to try on another day.
You know how to run a PowerShell Core session as administrator
You have a Docker Hub account and repository
Steps
SSH to MiniKube
Re-tag our image
Log in to Docker Hub
Push container image to Docker Hub
SSH to MiniKube
To login to MiniKube, execute the following command:
minikube ssh
After the command finished executing, you should see an output like the below:
Re-tag our image
To push our local container image to Docker hub, we need to re-tag the container image from <image-name>:<tag> into the format of <docker-hub-username>/<image-name>:<tag>
Before that, let’s take a look at the images that are available by running this command:
docker image ls
The container that we want to push to Docker Hub is “basic-mvc“. My Docker Hub username is zhixian
So I want to re-tag my local image to zhixian/basic:mvc:1 To do so, execute the command:
docker tag basic-mvc:1 zhixian/basic-mvc:1
After I finished executing the command and re-examine the images, I would see that I have an image tagged as zhixian/basic-mvc:1 Note that the image ID is the same as basic-mvc:1
docker login
To push this image, we need to login to our Docker Hub account by running the following command in MiniKube SSH:
docker login
The command will prompt you for enter your Docker Hub username and password. The following screenshot is what you should be seeing when you successfully log in.
Push container image to Docker Hub
To push the image to Docker Hub, run the command docker push <docker-hub-username>/<image-name>:<tag>. So in my case, the command would look like:
docker push zhixian/basic-mvc:1
Aside: Pushing the image may take a long time. Not sure if its because I’m using the free tier or its due to MiniKube. 🤔
After the command finished, you should be able to see it in your Docker Hub.
This blog post shows my experience creating a basic ASP .NET Core MVC application and generating a docker image from it and finally running it in Minikube.
You know how to start a PowerShell Core session as administrator
You have .NET Core 6.0 SDK installed
Steps
Create a basic ASP .NET MVC application
Create ASP .NET Core MVC application
Updating Kestrel port number
Build and test application
Preparations to for making docker image (Dockerfile)
Create a Docker image of the application
Running the Docker image in MiniKube
1. Create a basic ASP .NET Core MVC application
This step just creates a basic ASP .NET MVC application that we will use to create a Docker image.
1.1 Create ASP .NET Core MVC application
So start some an empty directory. Here, I usually start with an empty directory call “BasicMvc”.
Then I execute the following commands
dotnet new sln -n BasicMvc
dotnet new mvc -n BasicMvc.WebApp
dotnet sln .\BasicMvc.sln add .\BasicMvc.WebApp\
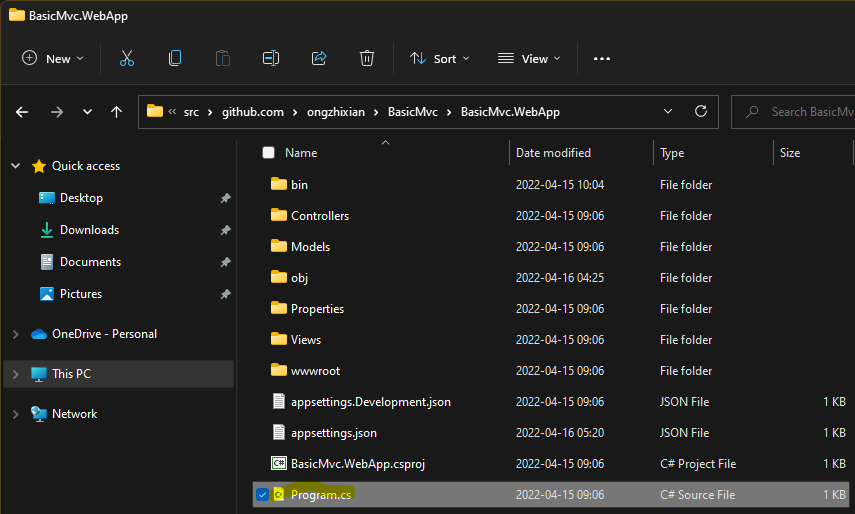
After it finished running, you should see something like this.
Note: I may also refer the BasicMvc.WebApp directory as project folder and the BasicMvc directory containing the .sln file as solution folder.
Aside: In further screenshots below, you might observed that I have 3 additional files (.gitignore, LICENSE, and README) in the folder.
1.2 Updating Kestrel port number
Kestrel is the built-in web server in ASP .NET. By default, it listens to port 5000 for HTTP requests and port 5001 for HTTPS requests when there is no Kestrel configuration defined.
Aside: I have no idea when this started but it seems that in the new versions of dotnet SDK (I’m using .NET Core 6 here), generating an ASP.NET Core MVC application via the template as we did will also generate a Properties folder with a file launchSettings.json.
The contents of this file affects which port numbers Kestrel will use when you run the application on your local machine. Below is the content of file on my computer.
When I run the application with the command dotnet run --project .\BasicMvc.WebApp\, on my local machine, it will use applicationUrl settings in the “BasicMvc.WebApp” profile. However this property file is not copied when you make a release build. In addition, if you have a Kestrel section in your configuration, that will take precedence over the settings here.
Running the application with the default ports is fine on your local machine but it will not work in your container environment when you deploy it to Kubernets. Specifically, the reason it will not work is because it will lack the default developer certificates on your computer. And hence when running in container environment, attempts to bind HTTPS will fail.
So we are going to add a Kestrel section in our configuration file and omit the HTTPS port. To do that, open the appsettings.json file in project folder.
The contents of the file should look like the following.
What we are doing here is explicit defining that when we run the project, it will only use HTTP port 5000 to serve HTTP requests.
Aside: While we can bundle the certificates along with the application to make HTTPS work, for the purpose of this blog post I opt to just omit HTTPS. Maybe I will cover this in another blog post.
We also need to make small change to the code in Program.cs file in the project folder.
The contents of the file should looks like the below:
Remove line 16 that reads app.UseHttpsRedirection(); So the resulting file should look like the below:
1.3 Build and test application
Now we want to build and test the application to make sure that its working. So in the folder run the following command to build and run the project.
dotnet run --project .\BasicMvc.WebApp\
You should get an output like the following:
Aside: The first time you run this, you might get a Windows Security Alert like below. This is because our Kestrel configuration uses the definition of http://*:5000 which means listen to port 5000 on all IP addresses.
To test if the application is working, copy the url type http://localhost:5000/ in your browser’s url text box. You should see a screen like the below:
2. Preparations to for making docker image (Dockerfile)
Now that we have a working application, we can transform it into a containerized application. To do that we need to add a files to the project folder:
Dockerfile
.dockerignore
Dockerfile is a set of instructions that describes how to make the container image. .dockerignore specifies which files or directories can be ignored when executing the instructions found in the Dockerfile
There are generally 2 approaches when making the container image for .NET that we can specify in Dockerfile:
Copy the source code to a temporary build container where it will build the application and use the built files to form the container image
Compiled the source code locally, and copy the built files to form the container image
In this blog post, we will take the 1st approach.
2.1 .dockerignore
For .NET applications, when we copy the files to temporary build environment, we do not need the bin and obj folder as they will be automatically generated when we build the application. So omitting them may speed up the copying process. So let’s add the following lines to the .dockerignore file:
bin/
obj/
The resulting file should look like:
2.2 Dockerfile
Next we will define the steps for creating the container image in our Dockerfile
# Building application
FROM mcr.microsoft.com/dotnet/sdk:6.0 AS build-env
WORKDIR /app

COPY . ./
RUN dotnet restore
RUN dotnet publish -c Release -o out --no-restore

# Build runtime image
FROM mcr.microsoft.com/dotnet/aspnet:6.0
WORKDIR /app

COPY --from=build-env /app/out .
ENTRYPOINT ["dotnet", "BasicMvc.WebApp.dll"]
So then contents of your file should look like this:
Explanation:
The instructions can be broadly group into 2 parts.
Lines 1 to 7 — Build and publish a release version of our application
Line	Description
2	"Create and set current environment using `mcr.microsoft.com/dotnet/sdk:6.0` container image
	Label this environment as `build-env` so that we can refer to it later."
3	Set `/app` as working directory in this environment
5	Copy the files where container image making tool is executed to the current directory (/app)
6	Perform `dotnet restore` on the project files
7	Publish a release version of the application in a folder named 'out' (/app/out)
Lines 9 to 14 — Copy the relevant files to make into container image
Line	Description
10	Create and set current environment using `mcr.microsoft.com/dotnet/aspnet:6.0` container image
11	Set `/app` as working directory in this environment
13	Copy files from the /app/out folder in `build-env` to current directory (/app)
14	Set the command to run when this container image is instantiated
Create a Docker image of the application
Now that we have our Dockerfile, we can create a container image using MiniKube. Start a new PowerShell Core session as administrator and navigate to the project directory. Let’s first ensure that our Minikube is up and running.
Looking good. Let’s now take a look at the container images that are currently available on MiniKube.
minikube image ls
Note: Container images available locally to MiniKube has the prefix docker.io/library
Let’s build the container image for our application using the following command:
minikube image build . -t basic-mvc:1
What this command do is execute instructions in the Dockerfile using the current directory to make an container image with the name of basic-mvc:1
Important: It is important to name the container images in the format of <image-name>:<tag>. If we do not specify a <tag> it will default to latest. The downside of using latest is that will cause MiniKube to run a check on the various container registries/repositories to identify if the image that you are instantiating is the latest image. This also means you need to publish your container image to a container repository before you can use the container image (something that you may not want to do when developing and testing)
After the command finished running, you should see an output like the below:
Now if we look at the container images available, we will see a line docker.io/library/basic-mvc:1 like below:
This means our container image has been created successfully.
Running the Docker image in MiniKube
Now we are ready to create an instance of container using image that we just created. There are 2 ways to create containers in Kubernetes:
Using Deployment
Create a Pod
I will use use Deployments and cover creating a Pod in another post. Execute the following commands:
To access the application, we need more information. Execute the following commands:
minikube kubectl -- get deployments
minikube kubectl -- get services
minikube ip
You should see something
The first command (get deployments) tells us that application is update and available. The second command (get services) shows how port 5000 of our instantiated container is mapped to in relation to MiniKube which in my screenshot shows is mapped to port number 31116. The third command tells us the IP of the MiniKube (Kubernetes) cluster.
Taking the IP (192.168.1.26) and the mapped port (31116), this means we can view our application from our computer by going to the browser and navigate to http://192.168.1.26:31116
In that post, I described how to install IBM MQ Advanced for Developers on to Windows 11. But after its installed, it requires some setup before we can use it. This blog describes how I setup IBM MQ on my PC.
Assumptions
You have PowerShell Core installed
You know how to start a PowerShell Core session as Administrator.
Steps
Setup PATH environment variable
Create Queue Manager
Start Queue Manager
Configure Queue Manager
Create user and group for running MQ client applications
Test setup
1. Setup PATH environment variable
In the original tutorial, Get an IBM MQ queue for development on Windows, it mentioned a step where you have to add setup IBM MQ’s installation folder into your Windows PATH environment variable.
However, I found that I do not have to do this.
To configure the PATH environment variable, start a PowerShell Core session and navigate to your IBM MQ’s installation folder (by default C:\Program Files\IBM\MQ\bin, my screendump below uses C:\Apps\IBM\MQ\bin).
In this folder, execute the following command:
.\setmqenv.cmd -s
This should setup the PATH. After you executed the command, close the PowerShell Core session and start a new PowerShell Core session. In the new session enter the following command to display information about IBM MQ.
dspmqver
If things are setup correctly, you should see something like the below:
Aside: Strangely, it states my O/S as Windows 10; not Windows 11 🙄🤣
Close this PowerShell Core session.
2. Create a Queue Manager
In IBM MQ, you need to have Queue Manager that will manage the queues that you will create.
To create the components required, start a PowerShell Core session running as administrator. To create a queue manager use the
crtmqm QM1
This command will create a queue manager named QM1
3. Start Queue Manager
After the Queue Manager is create, we need to start it by running the following command:
strmqm QM1
This will start the queue manager named QM1.
4. Configure Queue Manager
After you started the queue manager, you need to create some basic components.
Stop the default queue listener ‘SYSTEM.DEFAULT.LISTENER.TCP’ and replace it a new listener ‘DEV.LISTENER.TCP’
Define 3 queues ‘DEV.QUEUE.1’, ‘DEV.QUEUE.2’, and ‘DEV.QUEUE.3’
Define a dead-letter queue ‘DEV.DEAD.LETTER.QUEUE’
Define a topic ‘DEV.BASE.TOPIC’ using ‘dev/’ topic string
Define 2 channels ‘DEV.ADMIN.SVRCONN’ and ‘DEV.APP.SVRCONN’
Define connection authentication and channel authentication rules.
Assuming you save the contents into the a file call mq-dev-config.mqsc, in your download folder. In your PowerShell Core session, navigate to your Downloads folder (mine is call C:\prev\Downloads)
Run the following command to execute the instructions in the script:
Get-Content .\mq-dev-config.mqsc | runmqsc QM1
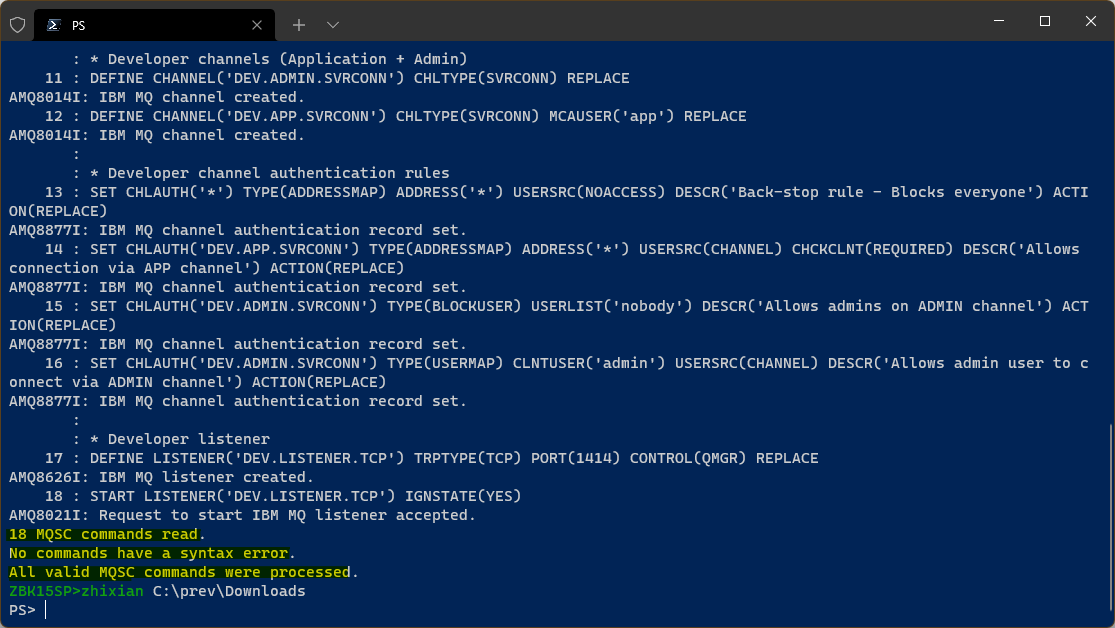
You should see an output like the following
At the end of the execution, the last three lines should read
18 MQSC commands read.
No commands have a syntax error.
All valid MQSC commands were processed.
5. Create user and group for running MQ client applications
We want MQ applications to be run from an account without admin privileges. So we will be creating the user account here.
It is possible to create user and group using PowerShell, but I prefer to use the graphical interface.
In your PowerShell Core session, run the following command to run the Local Users and Groups dialog:
lusrmgr.msc
Create group
We will create the group first. Right-click on the Groups item on the left pane to bring up the context menu.
On the context menu, click on the menu item labeled “New Group…”
This will display the New Group dialog. In the dialog enter mqclient in the group name textbox. Then click on the Create button at the bottom of the dialog to create the group.
After the group is created, you will see that the form is empty. Click on the Close button at the bottom to close the dialog.
Now when you select the Groups item on the left pane, you should see the group you created in the center pane.
Create user
To create user, right-click on the Users item on the left pane to display the context menu. Click on the menu item labeled “New User…” to display the “New User” dialog
On the “New User” dialog, enter a username for the user that you want to create. Here I use mqdev. Set a password for this user account in the “Password” and “Confirm password” fields. Because this is a development account that will only be used on my PC, I unchecked the default option “User must change password at next logon” and checked the options “User cannot change password” and “Password never expires”. Click on the Create button to create the user account.
After the user account is created, the blank form will be displayed. Click on the Close button to close the dialog.
Now if you click on the Users item on the left pane, you will see the user acount that you have just created in the center pane.
Assign user to group
We now want to assign the user account that we created to the mqclient group that we created earlier.
Right-click the on the account that you created and click on Properties on the context menu. This will display the Properties dialog for the account.
In the Properties dialog, click on the “Member Of” tab. Then click on the “Add…” button to select for groups to add this user account into.
In the text area, labeled “Enter the object names to select”, enter the group you created: mqclient Then click on the “Check Names” button
After you clicked on the Check Names button, the name you entered will be formatted. Click on the OK button to add user account into this group and close the dialog.
After you selected the group, you should see the group that you selected in the list box labeled “Member of”. Click on the OK button to save changes.
Setup authority
We now want add authority to the mqclient group so its members can connect to the queue manager and put and get messages to and from a queue.
In your PowerShell Core session, run the following command, to give permission for members for the mqclient group to be able to connect to queue manager QM1.
setmqaut -m QM1 -t qmgr -g mqclient +connect +inq
Then run the following command to allow members of the mqclient group to be able to put/get/browse messages on queues that matches the pattern “DEV.**” on queue manager QM1.
Then run the following test application to put messages into DEV.QUEUE.1:
amqsputc DEV.QUEUE.1 QM1
After you enter the command, it will prompt you for a password. Enter the password that you entered when creating the user account in step 5.
After you entered the correct password, start entering your message on the new line. Each line of message represents a queue message. When you want to stop putting messages, just hit <enter>
Getting messages from queue
To get the messages that you put the queue, run the following command:
amqsgetc DEV.QUEUE.1 QM1
Like the amqsputc command, it will prompt you for a password as well. Enter the password that you entered when you setup the user account in step 5.
After you entered the correct password, the messages that you placed on the queue are retrieved. After all messages are retrieved, the program will attempt to listen to further messages. If there are no more messages after 10 seconds, the program will automatically terminated as follows.
If you do not want to wait for the 10 seconds to be up, you can enter <CTRL>-C to terminate the program.
Conclusion
With this you now have a basic setup of IBM MQ that you can use for developing client applications.
This blog describes installing IBM MQ Advanced for Developers on Windows 11. I will cover setting up IBM MQ in another blog post. Its based on the tutorial “Get an IBM MQ queue for development on Windows” on IBM’s website.
Assumptions
You are using Windows 11 Pro
You know how to extract files from a zip folder
You have PowerShell Core installed
You know how to start a PowerShell Core session
Steps
Download IBM MQ Advanced for Developers installer
Extract files from installer
Run installer
Prepare IBM MQ
1. Download IBM MQ Advanced for Developers installer
This link will bring you to a license agreement page.
At the bottom of the page, click on the “I agree” link to start the download.
The download is a zip file.
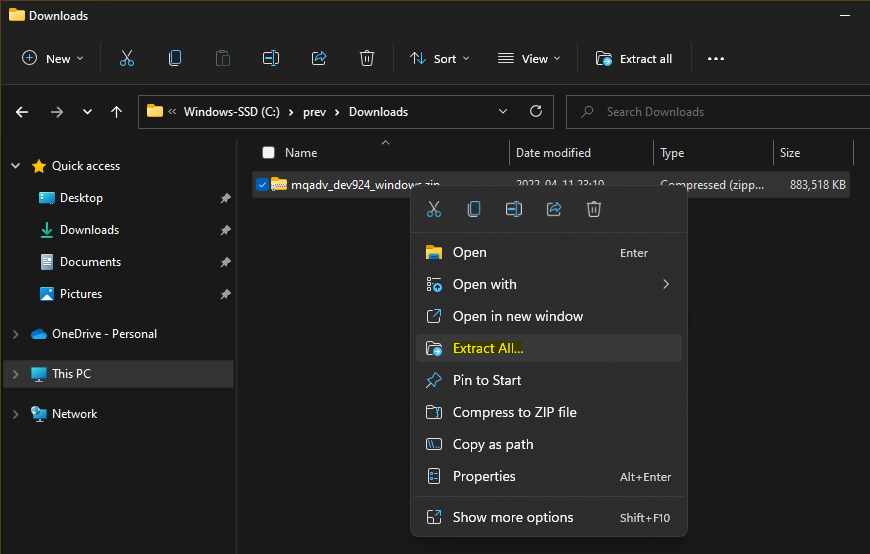
After download is complete, you should see a file named “mqadv_dev<version>_<platform>.zip” in your download folder.
2. Extract files from installer
To extract contents of the file, right-click the zip file to display the context menu and select “Extract All…” menu item.
After you clicked the “Extract All…” menu item, the “Extract Compressed (Zipped) Folders” dialog will be display. Accept the defaults and click on “Extract” button at the bottom of the dialog to extract files in the same folder as the zip file.
As the file is quite big, it will take some time to extract.
After you extracted the contents of the file, you should see the extracted files in the same folder as your zip file.
3. Run Installer
In folder where you extracted the contents of the zip file, go to “MQServer” folder. In the “MQServer” folder, go into the “MSI”
In the MSI folder, there should be an executable call “setup.exe”. Double-click the file to run the executable to begin the installation process.
After you run the executable, Windows’ User Access Control may prompt you for permission to install IBM MQ MSI Database. Click on the Yes button to continue with the installation process.
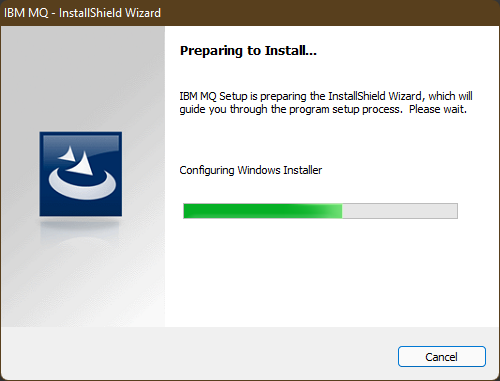
The first step of installation process is to select language for the installation. Select your language and click on the OK button on the dialog.
After you select the language, the installer will setup the installer.
Click on the Next button to continue with the installation process.
Next is the License Agreement. Click on the “I accept the terms in the license agreement” radio button to accept the license agreement. Click on the “Next” button to continue with the installation process.
Next select the type of installation. Although the “Typical” setup is fine, I want to customized the installation, so I selected “Custom” Click on the “Next” button to continue.
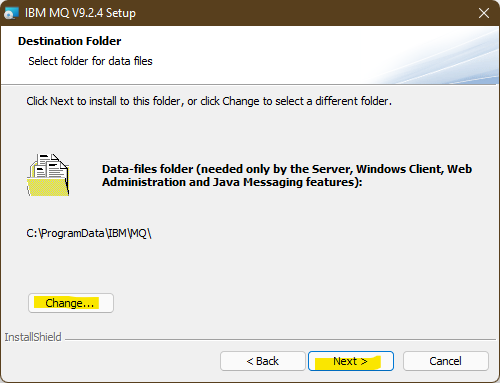
The first thing you can customize is the Installation Details. Click on the Next button after you made the necessary customizations.
The next thing to customize is the location of the data files. After you made your customizations, click on the “Next” button to continue with the installation process.
The third thing to customize is the location of log files. After you make your customization, click on the “Next” button to continue with the installation process.
Now we reach the most interesting part, selection of features to install. Below is the default.
While the default is fine, I opt to add the “Advanced Message Security” and “MQI Client” feature. Click on the Next button to continue.
The installer will display a summary of the changes its going to make on your computer. After you reviewed the changes, click on the “Install” button to proceed with installation.
After you clicked on the Install button, the installer will proceed to install application. This may take a while.
After the installation is complete, it will display the success dialog. Click on the Finish button to exit the installer.
4. Prepare IBM MQ
After you clicked the Finish button, you should see the “Prepare IBM MQ Wizard” dialog. Click on the Next button to proceed with setting up of IBM MQ.
The first thing to configure is the networking configuration. For a local development deployment, you probably should select “No” to the question “Are any of the domain controllers in your network are running Windows 2000 or later?”
Click the Next button to continue.
After the installer setup the network configuration, it will start IBM MQ service. After IBM MQ is prepared, it will prompt you with the following dialog. Click on the Finish button to exit the Prepare IBM MQ Wizard.
This completes the installation process. There are other things that needs to be setup in order to develop applications for IBM MQ. I will cover these in another blog post.
Public Key Cryptography Standards (PKCS) #7 and #12
So what is X.509 certificates?
X.509 actually refers to a Recommendation (or International Standard) defined by ITU Telecommunication Standardization Sector (ITU-T). This recommendation defines frameworks for public-key infrastructure (PKI) and privilege management infrastructure (PMI) and specification of certain data objects like public-key certificate and certificate revocation list (CRL).
In short, certificates that follow the specification of the public-key certificate data object in the recommendation are X.509 certificates.
Aside: The International Telecommunication Union (ITU) is a United Nations specialized agency in the field of telecommunications, information and communication technologies (ICTs) of which ITU-T is the division that looks after standardization. ITU-T was also previously known as CCITT (from its French name Comité consultatif international téléphonique et télégraphique) but was renamed to ITU-T in 1993.
Encoding (DER and PEM)
The X.509 only describes public key certificate data structure in Abstract Syntax Notation One (ASN.1). When storing (serializing) the data structure in a file, the information are encoded in one of the two forms:
a binary form using Distinguished Encoding Rules (DER) File extensions that maybe associated with this form are:
.cer
.der
a base-64 form using Privacy-Enhanced Email (PEM) File extensions that maybe associated with this form are:
.cer
.crt
.pem
Aside: Notice that .cer can represent both binary and base-64 form. This reflects the mess that the extensions are used in practice as there are no definitive standards. Personally, I favour naming DER-formated files with the extension .der and the other extensions to mean PEM-formatted files but certain vendors may leave you with no choice (e.g. insisting that you name the DER-formatted file as .cer or in other case insisting you name PEM-formatted file as .cer 🤷♂️.
Public Key Cryptography Standards (PKCS)
Public Key Cryptography Standards (PKCS) are a group of public key cryptography standards defined by RSA Security. Two standards that are commonly made use of are:
PKCS#7 Cryptographic Message Syntax (CMS) A format for bundling multiple certificates (certificate chain) and certificate revocation lists (CRLs) into a single file (for easier consumption). File extensions: .p7b
PKCS#12 Personal Information Exchange Syntax Standard PKCS#12 acts more like a archive format. Like PKCS#7, it also allow to bundle multiple certificates and certificate revocation lists (CRLs) into a single file. In addition, it also allow you to store private keys and has the additional functionality to be encrypted and signed. In practice, this format is often use to store just a private key with its corresponding certificate chain. Sometimes also known as PFX format. As it is an archive format, it is stored in binary form. File extensions: .pfx or .p12
You know how to run a PowerShell Core session as administrator
Problem
The previous blog post demonstrate setting up a local Kubernetes cluster on Windows 11 using Minikube. However, the setup is actually incomplete. When you stop and restart of Minikube, you will see the following error message:
In case you are wondering, following the instruction of minikube delete follow by minikube start does not work as well. You will get an output like the below if you try:
Note the line stating that the VM is having trouble accessing https://k8s.gcr.io. The problem is with Hyper-V default networking setup. Hyper-V by default uses a virtual switch that runs on an internal network and this internal network does not have Internet access. So we want to setup another virtual switch that connects to an external network through our network card in Hyper-V.
Checking the problem
To view the current settings of the minikube VM, click on the VM to select it and then click on Settings... on the Actions pane on the left.
In the Settings dialog, select Network Adapter under Hardware on the right pane. It should show that its using “Default Switch” for its Virtual Switch.
We now want to examine settings of Default Switch. Close the dialog by clicking on the OK or Cancel button.
Checking setting of Default Switch
On the Hyper-V manager, click on “Virtual Switch Manager” in the Actions pane on the right.
In the Virtual Switch Manager dialog, click the Default Switch under Virtual Switches on the left pane of the dialog. You will see that Connection type for the Default Switch is internal network. This means that the VM is on the internal network setup by Hyper-V. As such, it can only access resources on this internal network (and likewise is only accessible by resources on this internal network).
We do not want to use the internal network. We want the VM to be able to access the Internet so that it can pull container images from repositories hosted on the Internet. So we need to define a virtual switch that connects to a external (Internet) network using our network card.
Creating new external Hyper-V virtual switch
To do that, click on New virtual network switch under Virtual Switches on the left pane. On the right pane, click on External to select it as the type of virtual switch that we want to create. Click on Create Virtual Switch button to proceed with the next step.
After you clicked the Create Virtual Switch button, the pane on the right will display a form like the below. Enter a name for the virtual switch. Here I name it as inet-switch. The name does not matter so much, but its probably better if you named it as something short without white spaces as will use it later in a command-line.
Next, ensure that the External network is chosen for Connection type. When you select External network, you may have to select the network card. Select the one that you use to access the Internet. Then click on the OK button to save your changes.
When you clicked on OK, it will give you the following warning telling you that it may disrupt your network connectivity. So if you are not doing network critical task, click on the Yes button.
After you clicked the Yes button, it will display a “Applying changes…” dialog. The dialog will disappear when it finished making the changes.
Now that we got our external virtual switch setup. Let’s go fix Minikube.
Fixing Minikube
We want to delete the existing Minikube VM. After which we will re-create VM by instructing it to use the virtual switch that we just created.
Aside: Its possible to simply go the VM and assign the virtual switch that its using to the one that we just created. For the purpose of this blog post, I will not do that.
Start a PowerShell Core session as administrator. Then enter the following command:
minikube delete
After you run this command, the VM should be deleted.
Next start minikube start command with an argument “–hyperv-virtual-switch” and pass the name of the virtual switch that you created in Hyper-V earlier like so:
This command will create the minikube VM using the virtual switch that you created.
Thereafter, whenever you stop and start Minikube it should work correctly. The only annoyance is when you delete the cluster and start a new cluster, you need to remember to specify the --hyperv-virtual-switch argument.
This blog post is my notes on installing Minikube on Windows 11 and then starting a local Kubernetes cluster on Minikube. We then run an test application to ensure that it works.
Contents
A simplified understanding of Kubernetes
Installing Minikube
Enabled Hyper-V on Windows 11
Running Minikube
Installing kubectl
Running a test (hello-minikube) application
Assumptions
Screendumps on this guide is obtained from a machine running on Windows 11 Pro. I further assume:
you have PowerShell Core installed. PowerShell Core is used to run command-line instructions after Minikube is installed.
you know how to run a PowerShell session as administrator.
You do not have Docker installed.
My simplified understanding of Kubernetes
This is my mental concept of Kubernetes. When people say Kubernetes, what they are really referring to is a Kubernetes cluster.
Kubernetes Cluster	(organization unit for nodes)
└───Nodes		(machine-level)
    └───Pods		(organization unit for containers)
	└───Containers	(application-level)

A Kubernetes cluster consists of a set of machines call nodes.
These nodes host applications in groups of containers call pods.
On the page, go to the section Installation, and click the appropriate configuration, and click on latest release link. This will download the Minikube installer.
After you downloaded the installer, run the executable.
Installation is straightforward, I’ll not bored you with the details. Below are screendumps of my installation process
The destination folder here is my preference; its perfectly fine to accept the default location.
Installing Hyper-V
Minikube can be deployed as virtual machine (VM), a container or bare-metal. The type of deployment is dictated by the driver used when running Minikube.
Since I am opting not to install Docker on my PC, we can use the VM option. So that means we need to enabled Hyper-V. Press the Windows key, and enter “Turn Windows features on or off” in the search bar.
Select the “Turn Windows features on or off” menu item will display the following dialog. Checked the item labeled Hyper-V and click the OK button.
After you clicked the OK button, Windows will proceed to install the feature.
When its done installing feature, click on the Restart now button to restart the PC. After the PC restart, the Hyper-V feature should be installed.
Aside: For some strange reason, the first time I restart the PC, Hyper-V Manager was not installed. I went through the above steps, unchecked the Hyper-V option, restart the PC and re-checked the Hyper-V option again. On my second try, I can find Hyper-V Manager.
Running Minikube
After Minikube and Hyper-V are installed, we can run Minikube! (finally!)
Aside: Actually, this is not quite correct. The default settings of Hyper-V uses internal network for its default virtual switch. What we really want is for Minikube to use a virtual switch that can access external network. Without external network, Minikube cannot pull container images from repositories hosted on the Internet. I will cover how to do this in a subsequent blog post (see: Setup external virtual switch for Hyper-V for use with Minikube). But for the purpose of this guide, we can skip this for now.
To run Minikube, start a new instance of PowerShell (run as administrator) and run the following command:
minikube start
Aside: By default, installation location of MiniKube to added to the PATH environment variable which helps PowerShell find the MiniKube executable command in order to run it.
After the command finished executing, it would have created a Kubernetes cluster call “minikube”. You will see an output like the below:
If you look at Hyper-V Manager, you should see that the command created a VM call minikube.
Installing kubectl
kubectl is command-line tool to manage a Kubernetes cluster. To install it just run the following command:
minikube kubectl
Minikube will automatically detect that kubectl tool is missing and automatically download it.
Running a test (hello-minikube) application
At this step we have all that we need to host our test containerized application image k8s.gcr.io/echoserver. What this application does is listen on port 8080 and returns the request information that it received back to the caller.
To create this application run the following command to create deployment.
What this command does is equivalent to saying “I want to deploy a containerized application using the container image k82.gcr.io/echoserver with the tag 1.4. Name my deployment hello-minikube.“
Kubernetes will follow this instruction and set up the necessary pods (containers) needed to run the application in the image.
Aside: A deployment defines a desired state. In this example, we are saying we want to run an application using the container image k8s.gcr.io/echoserver:1.4. The Kubernetes’s Deployment Controller will make the necessary adjustments to match the desired state.
To see a list available deployments in the cluster:
minikube kubectl -- get deployments
So my screendump from the above, looks like the below:
At this step, you only define that your Kubernetes cluster should run your application using the image that you specified in a container. As mentioned, the application in our image serves requests on port 8080. We need to inform Kubernetes to route requests to this port so that our application can start serving these requests.
This is done by using kubectl’s “expose deployment” command. This will setup a Kubernetes Service that will intercept requests and route requests to your container. Run the following command:
This command tells Kubernetes “Setup routing service for my deployment hello-minikube. External requests should be routed to port 8080.”
Aside: There are 3 types of ports that you should know: NodePort, Port and TargetPort. How these ports are used depends on whether you are inside or outside the Kubernetes cluster. NodePort is the port number that we use to access the application from outside the Kubernetes cluster. We do not get to choose this number, its assigned by Kubernetes. Port is the is the service port number. For simple setups, this typically refers to the port number that containerized application is servicing (like port 8080 in our image). TargetPort is the port number that application listens to on the container level. In simple use cases, this should typically be the same as Port. By default, you do not have to set this; it will assume the same values as Port.
After you execute the command, you can list services defined using:
minikube kubectl -- get services
Below screendump show services before I run the expose command and after.
Note the column PORT(S). The value for the hello-minikube is 8080:31479/TCP. What this means, is that the TCP port 8080 in the container is mapped to external TCP port 31479.
This means we can access the application, using Minikube’s IP and this external TCP port number. Minikube’s IP are obtained using the following command (as shown in the last 4 lines of the screendump above):
minikube ip
So we start a browser and type in the following url, we’ll see a web-page like the following screendump.
http://172.21.218.112:31479/
Thats about it for a starting blog post on running a Kubernetes cluster on Windows 11 using Minikube. The default networking setup of Hyper-V still needs to be change to use Kubernetes properly. To fix that see my followup blog post Setup external virtual switch for Hyper-V for use with Minikube
When you run Android Virtual Device (AVD) on emulator, you may find you cannot use your physical keyboard to type text on the Android device. This is the default.
To enable your keyboard, go to your folder where where your AVD is stored. In that folder, there is a file call config.ini
Open this file and add this line:
hw.keyboard = yes
So it will look like:
After you save the file and restart the emulator, you should be able to use your physical keyboard to type text on the AVD.
After installation, we want to add the following paths to the path environment variable to make it more convenient to access the Android SDK commands.
%ANDROID_SDK_ROOT% is an environment variable that points to my Android SDK installation folder (which is C:\Apps\Android\sdk)
%ANDROID_SDK_ROOT%\cmdline-tools\latest\bin
%ANDROID_SDK_ROOT%\tools\bin
%ANDROID_SDK_ROOT%\platform-tools
%ANDROID_SDK_ROOT%\emulator
Note: One of the more confusing things that overlapping existences of the avdmanager.bat, lint.bat and sdkmanager.bat scripts that exists both in tools\bin and cmdline-tools\latest\bin folders. I decide to prioritize tools\bin and fallback to cmdline-tools\latest\bin. Aside: This proves to bad decision. Prioritizing cmdline-tools\latest\bin over tools\bin is more correct. The latest Android Gradle plug-in 7.0.0+ is no longer limited to Java 8. So using the sdkmanager command with a new version of Java (eg Java 17), sdkmanager will result in error .
After setting the PATH environment variable, you may need to restart your command-line shell for the changes to take effect.
2. sdkmanager first run
After setting the PATH environment variable, you can test changes by running the sdkmanager command.
sdkmanager
You may see the following warnings.
This is because the sdkmanager lacks permission to create a file call repositories.cfg. One way to resolve this is to run the command in Administrator mode. Rather than doing that we can also navigate to the folder and manually create the file there.
Create repositories.cfg file manually
3. Running Android on emulator
Next we want to set up an Android Virtual Device (AVD) so that we can run an emulated instance of Android on our PC.
To do that we need to:
Install a system image
Create a Android Virtual Device
Test the AVD on emulator
3.1. Install a system image
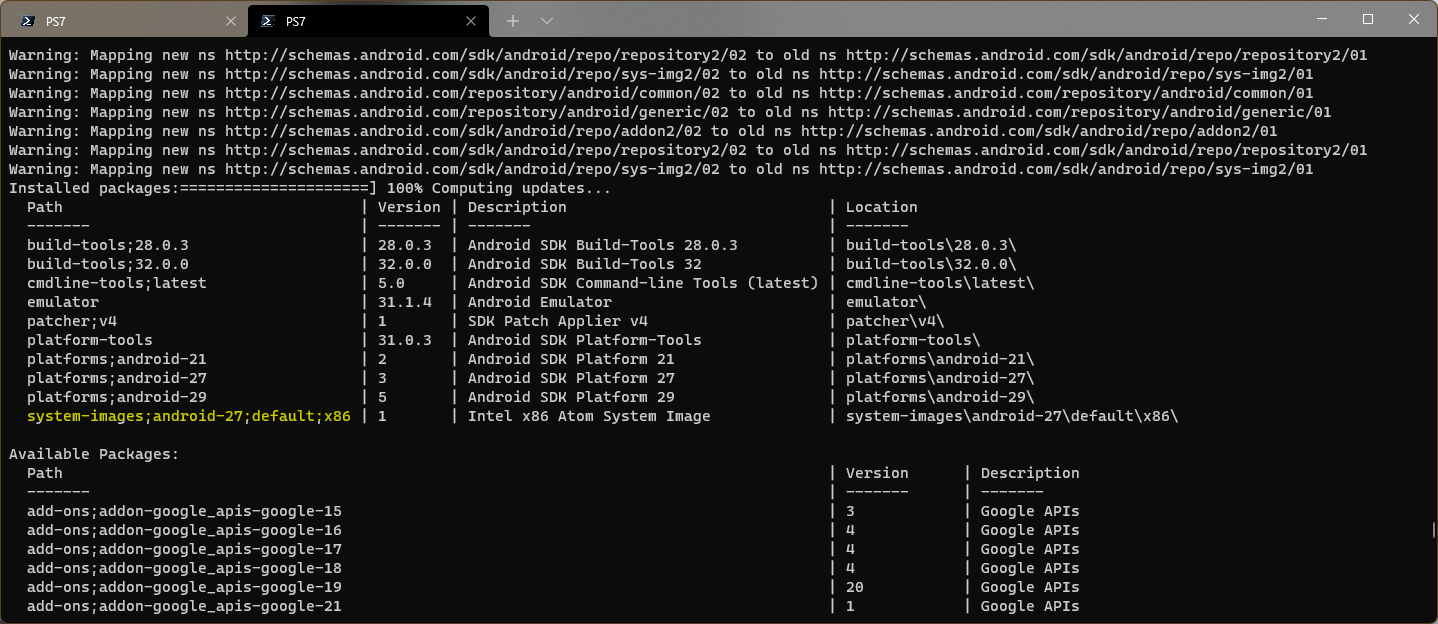
The system image to install depends on the device that you want to run on your Android emulator. For example, if I want to run a Android that supports up to Android API level 27, I would install the system-images;android-27;default;x86 image. So the command that I would run would be:
This command create an AVD named avd27 using the “system-images;android-27;default;x86” Android system image and stores it in a directory call C:\data\avd27
When you execute the command, you will be prompt if you want to create a custom hardware profile. Accept the default which is “no”.
After the AVD is created, we should see it when we run avdmanager list avd command now.
3.3. Testing the AVD on emulator
To run the AVD on emulator, we use the emulator command. We first test if the emulator is able to find the AVD by running the following command:
emulator -list-avds
The output of the command should look like:
To run the AVD, we run the following command:
emulator -avd avd27
The output of the command will look like:
The emulator window will also appear:
Now you have a minimal Android running on emulator.
4. AVD with device profile
Because we did not specify any hardware profile, the default AVD maybe quite small. So instead, you might want to create an AVD based on an existing hardware profile like Google Pixel. To create such an AVD run:
The above create an AVD using the “system-images;android-27;default;x86” Android system image and store it in the C:\data\avdPixel folder using “pixel” device profile.
To see a list of available hardware profiles, run the following command:
avdmanager list device
After the AVD is created, you can run it on emulator using the following command: