This blog post shows my experience creating a basic ASP .NET Core MVC application and generating a docker image from it and finally running it in Minikube.
Assumptions
- You have MiniKube installed and running
If not, you can refer to this blog post Setup and running a local Kubernetes cluster on Windows 11 using Minikube and this post Setup external virtual switch for Hyper-V for use with Minikube - You have PowerShell Core install
- You know how to start a PowerShell Core session as administrator
- You have .NET Core 6.0 SDK installed
Steps
- Create a basic ASP .NET MVC application
- Create ASP .NET Core MVC application
- Updating Kestrel port number
- Build and test application
- Preparations to for making docker image (Dockerfile)
- Create a Docker image of the application
- Running the Docker image in MiniKube
1. Create a basic ASP .NET Core MVC application
This step just creates a basic ASP .NET MVC application that we will use to create a Docker image.
1.1 Create ASP .NET Core MVC application
So start some an empty directory.
Here, I usually start with an empty directory call “BasicMvc”.

Then I execute the following commands
dotnet new sln -n BasicMvc
dotnet new mvc -n BasicMvc.WebApp
dotnet sln .\BasicMvc.sln add .\BasicMvc.WebApp\
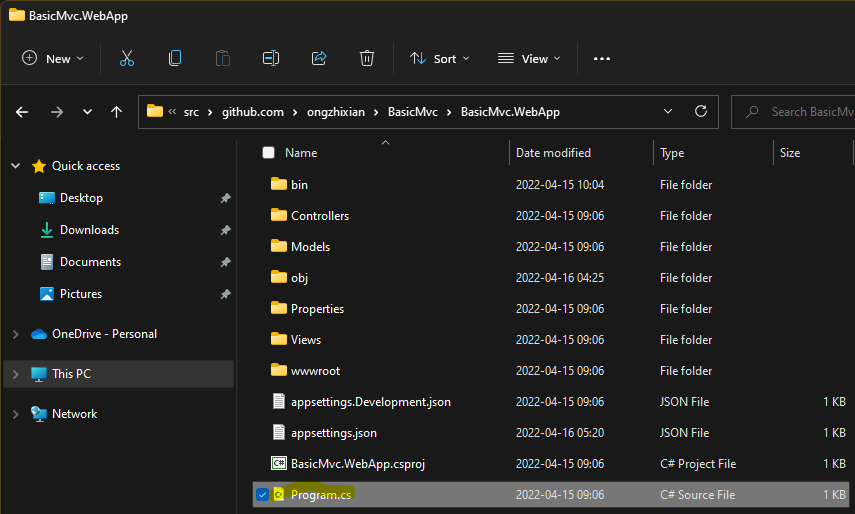
After it finished running, you should see something like this.

Note: I may also refer the BasicMvc.WebApp directory as project folder and the BasicMvc directory containing the .sln file as solution folder.
Aside: In further screenshots below, you might observed that I have 3 additional files (.gitignore, LICENSE, and README) in the folder.

1.2 Updating Kestrel port number
Kestrel is the built-in web server in ASP .NET.
By default, it listens to port 5000 for HTTP requests and port 5001 for HTTPS requests when there is no Kestrel configuration defined.
Aside: I have no idea when this started but it seems that in the new versions of dotnet SDK (I’m using .NET Core 6 here), generating an ASP.NET Core MVC application via the template as we did will also generate a Properties folder with a file launchSettings.json.

The contents of this file affects which port numbers Kestrel will use when you run the application on your local machine. Below is the content of file on my computer.

When I run the application with the command dotnet run --project .\BasicMvc.WebApp\, on my local machine, it will use applicationUrl settings in the “BasicMvc.WebApp” profile.
However this property file is not copied when you make a release build.
In addition, if you have a Kestrel section in your configuration, that will take precedence over the settings here.
Running the application with the default ports is fine on your local machine but it will not work in your container environment when you deploy it to Kubernets.
Specifically, the reason it will not work is because it will lack the default developer certificates on your computer. And hence when running in container environment, attempts to bind HTTPS will fail.
So we are going to add a Kestrel section in our configuration file and omit the HTTPS port.
To do that, open the appsettings.json file in project folder.

The contents of the file should look like the following.

Add the following configuration to the file:
"Kestrel": {
    "Endpoints": {
      "Http": {
        "Url": "http://*:5000"
      }
    }
  }
The result should look like the below:

What we are doing here is explicit defining that when we run the project, it will only use HTTP port 5000 to serve HTTP requests.
Aside: While we can bundle the certificates along with the application to make HTTPS work, for the purpose of this blog post I opt to just omit HTTPS. Maybe I will cover this in another blog post.
We also need to make small change to the code in Program.cs file in the project folder.
The contents of the file should looks like the below:

Remove line 16 that reads app.UseHttpsRedirection();
So the resulting file should look like the below:

1.3 Build and test application
Now we want to build and test the application to make sure that its working.
So in the folder run the following command to build and run the project.
dotnet run --project .\BasicMvc.WebApp\You should get an output like the following:

Aside: The first time you run this, you might get a Windows Security Alert like below.
This is because our Kestrel configuration uses the definition of http://*:5000 which means listen to port 5000 on all IP addresses.

To test if the application is working, copy the url type http://localhost:5000/ in your browser’s url text box. You should see a screen like the below:

2. Preparations to for making docker image (Dockerfile)
Now that we have a working application, we can transform it into a containerized application.
To do that we need to add a files to the project folder:
Dockerfile.dockerignore

Dockerfile is a set of instructions that describes how to make the container image..dockerignore specifies which files or directories can be ignored when executing the instructions found in the Dockerfile
There are generally 2 approaches when making the container image for .NET that we can specify in Dockerfile:
- Copy the source code to a temporary build container where it will build the application and use the built files to form the container image
- Compiled the source code locally, and copy the built files to form the container image
In this blog post, we will take the 1st approach.
2.1 .dockerignore
For .NET applications, when we copy the files to temporary build environment, we do not need the bin and obj folder as they will be automatically generated when we build the application. So omitting them may speed up the copying process. So let’s add the following lines to the .dockerignore file:
bin/
obj/
The resulting file should look like:

2.2 Dockerfile
Next we will define the steps for creating the container image in our Dockerfile
# Building application
FROM mcr.microsoft.com/dotnet/sdk:6.0 AS build-env
WORKDIR /app

COPY . ./
RUN dotnet restore
RUN dotnet publish -c Release -o out --no-restore

# Build runtime image
FROM mcr.microsoft.com/dotnet/aspnet:6.0
WORKDIR /app

COPY --from=build-env /app/out .
ENTRYPOINT ["dotnet", "BasicMvc.WebApp.dll"]
So then contents of your file should look like this:

Explanation:
The instructions can be broadly group into 2 parts.
Lines 1 to 7 — Build and publish a release version of our application
Line	Description
2	"Create and set current environment using `mcr.microsoft.com/dotnet/sdk:6.0` container image
	Label this environment as `build-env` so that we can refer to it later."
3	Set `/app` as working directory in this environment
5	Copy the files where container image making tool is executed to the current directory (/app)
6	Perform `dotnet restore` on the project files
7	Publish a release version of the application in a folder named 'out' (/app/out)
Lines 9 to 14 — Copy the relevant files to make into container image
Line	Description
10	Create and set current environment using `mcr.microsoft.com/dotnet/aspnet:6.0` container image
11	Set `/app` as working directory in this environment
13	Copy files from the /app/out folder in `build-env` to current directory (/app)
14	Set the command to run when this container image is instantiated
Create a Docker image of the application
Now that we have our Dockerfile, we can create a container image using MiniKube.
Start a new PowerShell Core session as administrator and navigate to the project directory.
Let’s first ensure that our Minikube is up and running.

Looking good. Let’s now take a look at the container images that are currently available on MiniKube.
minikube image ls
Note: Container images available locally to MiniKube has the prefix docker.io/library
Let’s build the container image for our application using the following command:
minikube image build . -t basic-mvc:1
What this command do is execute instructions in the Dockerfile using the current directory to make an container image with the name of basic-mvc:1
Important: It is important to name the container images in the format of <image-name>:<tag>.
If we do not specify a <tag> it will default to latest.
The downside of using latest is that will cause MiniKube to run a check on the various container registries/repositories to identify if the image that you are instantiating is the latest image.
This also means you need to publish your container image to a container repository before you can use the container image (something that you may not want to do when developing and testing)
After the command finished running, you should see an output like the below:

Now if we look at the container images available, we will see a line docker.io/library/basic-mvc:1 like below:

This means our container image has been created successfully.
Running the Docker image in MiniKube
Now we are ready to create an instance of container using image that we just created.
There are 2 ways to create containers in Kubernetes:
- Using Deployment
- Create a Pod
I will use use Deployments and cover creating a Pod in another post.
Execute the following commands:
minikube kubectl -- create deployment basic-mvc --image=basic-mvc:1
minikube kubectl -- expose deployment basic-mvc --type=NodePort --port=5000
You should see an output like the below:

To access the application, we need more information.
Execute the following commands:
minikube kubectl -- get deployments
minikube kubectl -- get services
minikube ip
You should see something

The first command (get deployments) tells us that application is update and available.
The second command (get services) shows how port 5000 of our instantiated container is mapped to in relation to MiniKube which in my screenshot shows is mapped to port number 31116.
The third command tells us the IP of the MiniKube (Kubernetes) cluster.
Taking the IP (192.168.1.26) and the mapped port (31116), this means we can view our application from our computer by going to the browser and navigate to http://192.168.1.26:31116

Reference
- Docker images for ASP.NET Core
(https://docs.microsoft.com/en-us/aspnet/core/host-and-deploy/docker/building-net-docker-images?view=aspnetcore-6.0) - Configure endpoints for the ASP.NET Core Kestrel web server
(https://docs.microsoft.com/en-us/aspnet/core/fundamentals/servers/kestrel/endpoints?view=aspnetcore-6.0)

Leave a comment